한국에서 운영 중인 서비스를 향후 외국까지 확장한다면, 해당 국가의 언어 적용이 필요하다.
그럴때마다 모든 페이지의 텍스트를 일일히 바꾸는 것은 매우 비효율적이므로
next-i8next라는 모듈을 사용하기로 했다.
소스코드의 깃허브 리드미에 문서가 상세히 작성되어 있어 이를 참고하며 진행했다.
https://github.com/i18next/next-i18next
GitHub - i18next/next-i18next: The easiest way to translate your NextJs apps.
The easiest way to translate your NextJs apps. Contribute to i18next/next-i18next development by creating an account on GitHub.
github.com
1. 설치하기
npm install next-i18next react-i18next i18next
2. 번역 파일 생성하기
.
└── public
    └── locales
        ├── en
        |   └── common.json
        └── ko
            └── common.json
next에서는 정적인 파일들을 public 폴더 내에서 관리하고 있다.
번역 관련된 파일들 또한 정적인 파일들이므로 public 폴더에 위치시켜야 한다.
locales라는 폴더 내에 사용할 국가의 폴더를 만든 후,
각 폴더 내에 해당 국가의 언어로 작성한 번역 파일을 json 형식으로 넣어주면 된다.
(common은 번역 파일 이름일 뿐, 다른 이름으로 설정해도 무방하다. 단, 국가별 폴더에는 동일한 이름의 파일이 존재해야 한다.)
// locales/ko/common.json
{
  "greeting": "안녕하세요",
  "goodbye": "안녕히 가세요"
}

// locales/en/common.json
{
  "greeting": "Hello",
  "goodbye": "Goodbye"
}
3. next-i18next.config.js
프로젝트의 루트에 next-i18next.config.js 파일을 생성해준다. (.ts로 해주면 에러가 난다. 왜 그럴까...)
이 파일은 next-i18next 모듈에게 내 번역 파일들이 어디에 있고, 디폴트로 어떤 것을 사용할 지를 알려주어 서버 상에서 번역을 preload 할 수 있게 해준다.
module.exports = {
  i18n: {
    defaultLocale: "ko",
    locales: ["ko", "en"],
    ns: ["common"],
  },
  localePath: require("path").resolve("./public/locales"),
};- defaultLocale : 디폴트값으로 보여줄 국가 언어
- locales : 사용할 국가 언어 약어들
- ns : 네임스페이스. 파일 명이라고 보면 될 것 같다.
- localePath : 번역 파일들의 경로
4. next.config.js
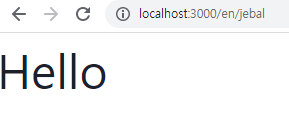
next-i18next.config.js 파일에서 export한 i18n을 넘겨주어 URL 라우팅을 할 수 있게 설정해야 한다.
(기본적으로 next 앱을 만들면 생기는 파일에 i18n만 따로 추가해주면 된다.)
const { i18n } = require("./next-i18next.config");

const nextConfig = {
  i18n,
  reactStrictMode: false,
};

module.exports = nextConfig;
5. _app.tsx 설정
next 앱 전역에 걸쳐서 번역이 적용되게 하기 위해서, appWithTranslation으로 앱을 한번 감싸줘야 한다.
...
import { appWithTranslation } from "next-i18next";

const App = ({ Component, pageProps }: AppProps) => {
  return <Component {...pageProps} />
};

export default appWithTranslation(App);
6. serverSideTranslation
공식 문서에는 이렇게 소개되어 있다.
사용 사례에 따라 getStaticProps 또는 getServerSideProps를 통해 페이지 수준 구성 요소에 포함해야 하는 비동기 함수입니다
Next는 SSR을 제공하고 있기 때문에, 번역 또한 서버 단에서 해주는 것 같다.
번역 텍스트가 필요한 파일 내에 serverSideTranslation 함수를 만들어주면된다.
import Head from "next/head";
import React from "react";

import { useTranslation } from "next-i18next";
import { serverSideTranslations } from "next-i18next/serverSideTranslations";

export const getServerSideProps = async ({ locale }: any) => {
  return {
    props: {
      ...(await serverSideTranslations(locale, ["common"])),
    },
  };
};

export default function Home(props: any) {
  const { t } = useTranslation("common");

  return (
    <>
      <h1>번역해보자</h1>
    </>
  );
}
이 때 궁금했던 점은, getServerSideProps라는 함수를 만든 후, 실행시키는 부분이 없었기 때문에
실행시키는 부분이 따로 필요한지였다. 하지만 공식 문서 상에서는 해당 함수를 실행시키는 부분에 대한 언급이
하나도 없었다.
그래서 찾아보니, getServerSideProps라는 함수는 Next.js에서 서버가 실행되는 시점에 호출되는 함수라고 한다. 그러니 내가 따로 호출할 필요가 없었다!
서버 측 렌더링을 수행할 때, 즉 페이지가 최초로 요청되었을 때
getServerSideProps 함수가 호출되며, 해당 함수에서 반환한 props가 페이지 컴포넌트로 전달됩니다. 이후에는 클라이언트 측에서 페이지 전환 시에는
getServerSideProps 함수가 호출되지 않고, 클라이언트 측에서 동적으로 데이터를 가져오는 데 사용되는 다른 방법을 사용해야 합니다.
by chat-gpt... 👍
7. useTranslation
이제 거의 다 했다.
next-i18next 모듈에서 제공해주는 useTranslation이라는 함수를 이용해 번역을 할 수 있다.
이 때 인자로 네임스페이스를 문자열로 넣어주면 된다.
나는 앞서 common이라는 번역 파일을 생성해두었으므로, common을 인자로 넘겨주면 된다.
이후 JSX 내에서 t 함수 내에 번역 파일 key 값을 입력해두면 끝이다.
import Head from "next/head";
import React from "react";
import { useTranslation } from "next-i18next";
import { serverSideTranslations } from "next-i18next/serverSideTranslations";
export const getServerSideProps = async ({ locale }: any) => {
return {
props: {
...(await serverSideTranslations(locale, ["common"])),
},
};
};
export default function Home(props: any) {
const { t } = useTranslation("common");
return (
<>
<h1>번역해보자</h1>
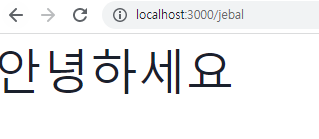
<p>{t('greeting')}</p>
</>
);
}
서버를 껐다 켜야 반영된다!!!!
(npm run dev 다시 하라는 소리입니당 새로고침 말고!)
8. 한 페이지에서 여러 개의 번역 파일을 사용하고 싶다면
test.json이라는 번역 파일을 더 사용하고 싶다고 해보자.
ko폴더와 en폴더 모두에 번역 파일을 만들어준 후 아래의 단계를 따르면 된다.
1) next-i18next.config.js 속 네임스페이스 추가해주기
module.exports = {
  i18n: {
    defaultLocale: "ko",
    locales: ["ko", "en"],
    ns: ["common", "test"], // test라는 새로운 번역 파일 추가
  },
  localePath: require("path").resolve("./public/locales"),
};
2) 번역 파일을 사용하는 페이지 수정
- getServerSideProps 함수 수정 : serverSideTranslation의 2번째 인자로 들어가는 배열에 새로운 번역 파일 네임스페이스를 추가한다.
- useTranslation 함수 수정 : 인자로 들어가는 배열에 새로운 번역 파일 네임스페이스를 추가한다.
- 사용하기 : 키값 앞에 해당 네임스페이스를 명시해준다. ( t ('네임스페이스:키값') )
ex. common.json 파일의 'greeting' 키값을 사용하여 번역하는 경우 -> t ('common:greeting')
import Head from "next/head";
import React from "react";
import { useTranslation } from "next-i18next";
import { serverSideTranslations } from "next-i18next/serverSideTranslations";
export const getServerSideProps = async ({ locale }: any) => {
return {
props: {
...(await serverSideTranslations(locale, ["common", "test"])), // 새로운 번역 파일 추가
},
};
};
export default function Home(props: any) {
const { t } = useTranslation(["common", "test"]); // 새로운 번역 파일 추가
return (
<>
<h1>번역해보자</h1>
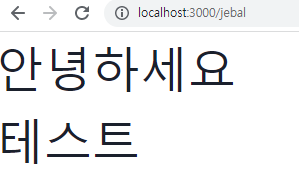
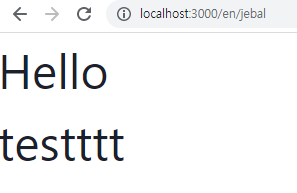
<p>{t('common:greeting')}</p> // common.json으로 번역
<p>{t('test:test')}</p> // test.json으로 번역
</>
);
}서버를 껐다 켜야 반영된다!!!!
(npm run dev 다시 하라는 소리입니당 새로고침 말고!)
사용한 패키지 버전
'Library-Framework > Next.js' 카테고리의 다른 글
| [Next.js] Google Maps API로 지도에 원 그리기 (당근마켓 내 동네 설정 따라해보기) (0) | 2023.06.28 |
|---|---|
| [Next.js] 프로젝트 생성하기 (0) | 2022.12.07 |

